Configuring Color-Coding on the Timeline
As an administrator, you can set up color-coding for activity bars in the Timeline display mode. Color-coding makes it easier for users to identify activities at a glance.
There are two methods for color-coding activity bars:
-
Default color-coding (based on activity type group): Color-codes the activity bars according to the activity type group that they belong to. After it has been set up, this color-coding method is applied to the Timeline display mode by default.
-
Color-coding by attribute: Color-codes the activity bars based on the value set on an activity for a user-selected attribute.
Both color-coding methods are optional, so you can choose to set up only one of the two if needed.
Before You Begin
To follow the instructions in this section:
-
You must have administrator access to your Uptempo instance.
-
You must have the necessary administrator permissions to access Activity Configuration.
Set Up Default Color Coding
You can set a Timeline Color for each of your activity type groups. The Timeline Color you set on an activity type group is used as the default color on the Timeline for all activities of the activity types within that group. If no Timeline Color is set on an activity type group, the system will display the applicable activity bars in the Timeline using the system-default color (purple).
Note
If an activity type is not part of a type group, you can also set a default color directly on that activity type. However, for all activity types that belong to a type group, the default color can only be set on the type group it belongs to.
To set a default Timeline Color for an activity type group, follow these steps:
Note
These instructions refer to activity type groups throughout, but you can follow the same steps to set the Timeline Color on any standalone activity type that is not part of a type group.
-
In Uptempo, click Activities in the sidebar to view the activity hierarchy.
-
Click
 Settings.
The Activity Configuration page opens.
-
In the Activity Configuration menu, click Activity Type Groups.
The Activity Type Groups settings open.
-
In the Activity Type Groups Configuration panel, click the activity type group for which you want to set a default Timeline Color.
-
In the settings for the selected activity type group, click the Timeline Color setting.
The color picker opens.
-
In the color picker, select the default color you want to use for activities in this type group on the Timeline. You can:
-
Use the color picker controls to choose a specific color and shade
-
Type a hex code into the text field
-
Click on a preset color from the default color set

-
-
After you have chosen a color, click Save Changes. Your changes will take effect immediately.
-
Optional: Repeat steps 4-7 to set Timeline Colors for your other activity type groups, if needed.

You have successfully set default Timeline Colors for activity type groups. The Timeline Colors you set will be used on the Timeline whenever  Select Color Coding > Color by is set to the Default color option.
Set Up Color-Coding for an Attribute
You can set up color-coding for any Drop-Down List attribute by assigning a color to each of the attribute's values.
After you have configured an attribute for color-coding, that attribute becomes available as an option in the Select Color Coding > Color by menu on the Timeline. When users select the attribute from this menu, the activity bars are color-coded according to the value the activity holds for the selected attribute, using the colors you have specified for each attribute value. For more details, see Color-Coding Timeline Activities.
Note
You must set up color-coding for each Drop-Down List attribute separately.
To set up color-coding for an attribute, follow these steps:
-
In Uptempo, click Activities in the sidebar to view the activity hierarchy.
-
Click
Settings.The Activity Configuration page opens to the Attribute Definitions section.
-
In the list of attribute definitions, click on the Drop-Down List attribute for which you want to set up color-coding.
The attribute's Attribute Details panel is displayed.
-
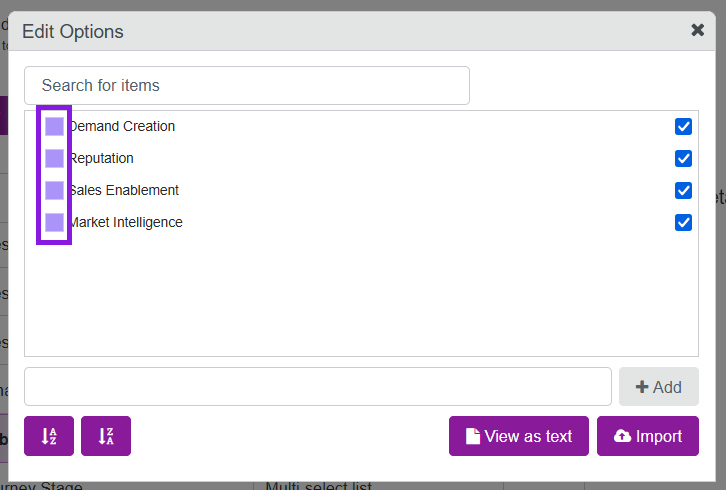
In the Attribute Details panel, click Edit Options.
The Edit Options dialog opens.
-
To set the color for an attribute option, click the colored square by the option's name:

The color picker panel opens.
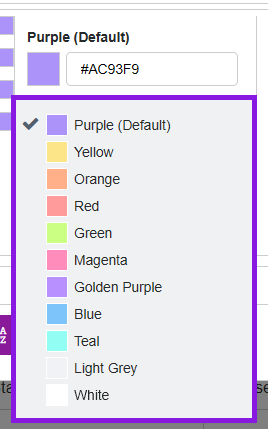
Note
By default, all options are set to the Purple (Default) color.
An attribute is displayed in the Color by menu when at least one attribute option has been set to a color other than the default color.
-
Use the color picker panel to choose a color for the selected attribute:
-
Click on any of the color presets to select that color:

-
Optional: To specify a custom color, type the hex code for the color you want into the text field:
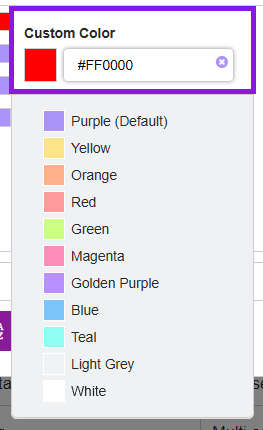
Note
The color you set here will be used as the background color for the activity bar. Based on the selected background color, the system automatically sets the text color of the bar's activity name label to a light or dark color to ensure it is readable.
-
-
Click anywhere outside of the color picker panel to save your color choice for the selected option.
-
Repeat steps 5 to 7 to set colors for other attribute options as needed.
-
When you are finished, click
 Close on the Edit Options dialog to exit.
You have set up color-coding for an attribute. The attribute will now appear as a selectable option in the Select Color Coding > Color by menu on the Timeline.